Showing posts with label CURRIES/GRAVIES. Show all posts

Sunday, January 20, 2019

SPICY KADAI PANEER


A spicy, tangy, delicious gravy that goes well with pulao and rotis.  The dish gets it unique flavor from freshly ground coriander seeds, pepper, red chilly, and jeera.  I made it little bit spicy to suite our family taste. 


INGREDIENTS:
Paneer - 200 g
Onion - 2
Capsicum - 1
Red chilly powder - 1 tsp
Salt - to taste
Butter - 1 tsp
Bay leaf -1
Jeera - 1/2 tsp

To dry roast and grind:

Red chilly - 4
Black peppercorn - 1 tsp
Coriander seeds -1 tsp
Jeera - 1 tsp

To fry in oil and ground
Garlic -2 pods
Ginger - 1/2 inch piece
Onion - 2 (sliced thin)
Tomato - 3 medium sized

PREPARATION:
1. Dry roast coriander seeds, red chilly, black peppercorn, and jeera and ground coarsely and keep aside.


2. In a heavy bottomed pan, heat oil, add garlic pods, ginger, onion, and tomatoes.  Cook in medium flame until the tomatoes turn mushy.  Turn off and ground the mixture smoothly once it has cooled down completely.

3. In the same pan, add butter, throw in bay leaf and jeera, add the diced onion and little salt.  Once the onions have turned brown, add the cubed capsicum and saute it gently.  Add in chilly powder and mix well.  Once the capsicum has become crunchy soft, add the ground masala and later add the freshly ground powder.  Add little water and adjust salt as necessary.  Add the cubed paneer and mix well and let it boil until the masala coats paneer well and gravy is thick but not dry. Add the chopped coriander leaves. 
Serve the delicious, spicy Kadai panner with rotis or pulao.

Friday, June 29, 2018

VAZHAIPOO KOLA URUNDAI KUZHAMBU (BANANA BLOSSOM DUMPLINGS COOKED IN TANGY MASALA GRAVY)


Just back from office and the much awaited weekend started; chilling at home relaxing myself sitting in the favorite spot on the couch.  Last few weeks have been very hectic and transitioning to more commitments and heavier workloads which is making me go insane.  With these tiring days, I could not justify myself to have a little "me" time.  To overcome the guilty feel of not having the little time for myself, I deliberately pushed myself to get into the mode of having a little "me" time today before I need to recharge me for weekend only allocated house chores.   

While there are lot of items pending in draft, I chose to post a healthier stuff which someone could try upon over the weekend - Vazhaipoo Kola Urundai Kuzhambu.  The English translation for his recipe would be Banana Blossom Dumpling gravy.  This is a gravy made with a steam-cooked banana blossom dumplings cooked in tamarind sauce.  The gravy tastes heavenly with hot steamed rice. 

The prep work is very tedious as you need to clean each floret of the flower but given the healthy nature it is worth spending time for it.  Since cleaning takes time, I prefer to make it over weekends where I clean on a Saturday afternoon or at nights while watching some TV shows after finishing the household work.   I usually make Parupu usili with this but this time DH suggested to make Chettinad dish - Kola urundai kuzhambu.  Will write a separate post in detail on how to clean the banana flower. 

INGREDIENTS:
Banana Blossom - 2 cups
Small onion - 1 cup
Tomato - 2
Garlic - few pods
Sambar powder - 2 tsp
Salt to taste
Oil  as needed

To Roast and Grind:
Hing /Asafoetida - a small peppercorn size
Channa dhal - 1 tsp
Coriander seeds - 1 tsp
Urad dhal - 1/2 tsp
Peppercorn - 5
Grated coconut - 1/4 cup
Red chilly - 2 tsp

For Tempering:
Mustard seeds - 1 tsp
Curry leaves - few

For Kola Urundais:
Bengal gram - 1 cup (Soaked in water)
Red chilly - 4
Salt - to taste
PREPARATION:
Discard the unwanted parts from the individual florets.  Then cut them into small pieces and soak in buttermilk to avoid turning black. 
Soak tamarind in warm water and extract the tamarind juice from the pulp.
In little oil, roast and grind the ingredients given in the tempering item list (Hing, channal dhal, red chilly, peppercorn, coriander seeds, and coconut).

Soak Channal dhal for 1 hour and grind it little coarsely with red chilly and salt first.  Later add the cut banana blossom and give a pulse.
Make small lemon sized balls, arrange it in a greased idly plate, and steam it for 12-15 mins in idly plate.  Allow it to completely cool before adding to the gravy.
In a kadai/pan, add oil and sizzle with tempering items, add small onion and later chopped tomatoes.  Add salt and sambar powder and mix well.  Add the extracted tamarind pulp and let this boil for 10 minutes.  When the small onions gets cooked, add the ground paste and let it boil for 2-3 minutes.  Gently add the steamed cooked banana blossom-lentil mixture balls to the gravy.  After some times, it would start to float on the top of the gravy.  
That's it, by now the gravy would have become thick and would have turned into a thicker texture.  


Transfer to a bowl and enjoy with hot steamed rice with a teaspoon of gingely oil.

Saturday, May 27, 2017

BEET GREENS-LENTIL MIXTURE WITH BROWNED ONIONS

Back home three weeks back after a tiring business trip.   Though I bounced back immediately into cooking, I was inching back on my another routines, hence could not sit for blogging. 

Being at home is the best feel one could have after a long, strenuous and demanding business trip.  I was returning back home on our anniversary day and DH was eagerly waiting for me at the airport to receive me.  We are entering into our 13th year of marital bliss.  I know nobody in this World would love me as much as him and tolerate my silly nonsense stuffs.  I could not find any best words to describe it.  It was surprising to see him with a bouquet of flowers .  DH never express himself much but his actions always speaks louder than his words.   I always look forward to the Airport pickups by DH and Jr. H.  I could feel the love and contentment in DH eyes.  Jr.H would run towards to me and always gives me a big hug and would melt my heart and calm my soul.

While it was only work and work when I was away home, I was eagerly looking forward to the planned personal vacation after my return.  We have planned for a vacation to Ooty, one of the most popular and gorgeous hill stations in South India.  We have been there couple of times before and this is our third trip there.  As we have seen all the sightseeing locations on our earlier trip, we planned this trip truly for leisure and have good amount of family time.  During our trip, the nature was at its best and we enjoyed the cold nights and chilled evenings.  Our long morning and evening walks rejuvenated us .   Jr. H was more excited than us and he became our photographer and clicked many pictures of this memorable trip :-).

While we were back to Chennai, I grabbed lot of native vegetables from the very famous hill station.  The freshly plucked carrots, beets, and radishes looked vibrant and colorful and seized my eyes.  The vegetables were seen with colorful leafy greens adorning their top.  We never get these vegetables with leaves here in the market.  I have heard a lot that these greens are very nutritious and wanted to try it out.  So I took care in bringing them back them.  I wrapped them in wet towel so that the leaves would not go wilt.  I was managing the kitchen for a whole week with the veggies I got from there.


I prepared the beet greens adding moong dhal and it turned out to be a hit at home instantly.  The exotic taste rendered from the beet greens were elevated with the addition of firmly cooked yellow moong dhal .  I tempered the dish with browned onions which additionally enhanced the flavor to the dish.

Ingredients: 
Beet Greens - 1 cup
Moong dhal - 1/4 cup
Garlic - 4 pods
Green chilly - 1
Salt - to taste

To Temper:
Mustard seeds - 1 tsp
Urad dhal - 1 tsp
Red chilly - 1
Onion - 1 (Sliced thin)

Preparation:
1.  Remove the greens from the stem, wash it thoroughly in running cold water, and chop roughly.

2. Cook the moong dhal in pressure cooker for 2 whistles with salt 
and little water.  I like the dish to be crunchy, hence I cooked the moong dhal firmly and not mushy
3. In a vessel, add the greens, little water, salt, garlic pods, and green chilly and allow it to cook in medium flame for 5-7 minutes.  Stir in between, the greens would cook faster.  Once they become tender and cooked, add in the cooked moong dhal (skinned split mung gram) and mix well. Allow it to cook for 2 more minutes.  Switch off the flame once the dhal blends nicely with the greens.

4.  Heat oil in a pan and throw in the tempering items one by one.  Once the mustard seeds sizzles, add the urad dhal, red chilly followed by sliced onions.   Saute well in low flame until the onions are browned.  Browning of onions would take little time, so need to be patient in it.  When it is browned well, add it to the dish and mix well.

Serve it as an accompaniment with steamed rice.

We had this as an accompaniment for small red radish sambar (will post the recipe next) and garlic rasam.  

Sunday, April 30, 2017

PARUPPU URUNDAI KUZHAMBU - LENTIL BALLS COOKED IN TAMARIND SAUCE

Another post from my draft.....

One more week to go to join with family and I already started counting the days here.  This weekend is a long weekend everywhere and I badly miss being at home.   On the weekdays, I was deep diving at work here which keeps me going without missing family.  Also surrounded by some understandable soft nature colleagues who patiently listens to my nonsense stuffs and makes my days lighter.   Weekends are hard to pass by and only my long walks with no real destination are helping me to pass time on the weekends. 

Ahhhh, as I think of work now, some immediate random thoughts are flashing up on my mind now.  I could foresee some changes at work environment and I am getting prepared for it.  I really like the role that I had play and get many learning exposures while interacting with cross functional teams co-located worldwide.  The team I work with feels like a family, everyone here truly respects each other and help each other at work.  During this journey, some of my team mates have turned into good friends.  The paths have changed for some of my wonderful colleagues and I am still in touch with them.  Well, the process changes are inevitable and we should adapt ourselves.  Let's see what's in store for me next...

At home, both DH and Jr. H are enjoying the long weekend.  Home is filled with guests from DH's end, so DH is on full swing mode of enjoyment, taking them for long drives, beaches, malls, film, restaurant.  In fact, I am bit relieved that both of them are enjoying without thinking about my absence, otherwise I would go to a very moody mode worrying about them. 


Not to take too much time about the happenings, let me move further to the recipe.  There are many variations to this dish and I follow the authentic method of my family with a mild twist.  This Paruppu Urundai Kuzhambu is prepared from ground dhal mixture with red chillies, asafeotida, and salt.  The lentil balls are made out of the ground mixture and cooked in tamarind sauce in slow to medium flame on stove top.  Just to add rich flavor to the dish, I roasted some Indian spices and ground it with coconut and added to the kuzhambu and it tasted out of the world.  


INGREDIENTS:
Tool Dhal:  1 cup
Bengal gram: 1/4 cup
Red chillies - 8-9
Salt - To taste
Asafoetida - a pinch
Tamarind water (Extracted from soaked tamarind pump) - 4 cups
Sambar Powder -1  tsp
Oil - 4 tsp

To roast and grind:
Asafoetida - small piece (powder could also be used as an alternate)
Red chillies - 5
Bengal gram - 1 tsp
Urad dhal - 1/2 tsp
Coriander seeds - 1 tsp
(Roast all the above items in little oil and grind with 2 tsp of coconut)

To Temper:
Oil - 1/2 tsp
Mustard seeds - 1 tsp
Curry leaves - few

PREPARATION:
Soak toor dhal+Bengal gram together for an hour.

Meanwhile soak tamarind in warm water for some 15 minutes and extract the tamarind juice from the pulp
Filter the water out from the dhal after an hour carefully and grind it along with red chilly, asafoetida, and salt.  Care must be taken to drain the water completely from the soaked mixture before grinding, otherwise the lentil balls would dissolve while adding to the kuzhambu.  If you feel  the mixture is very solid during grinding part, you can sprinkle little water then and there.  Kindly note the salt is to be added only for the mixture and salt for the gravy needs to be added separately later.  
In a heavy bottomed pan, add oil, throw in a tsp of mustard seeds and when it crackles, add the ground mixture carefully and mix well with a ladle.  After few mins, the mixture would come to a texture where you could sense the moisture from the mixture is left, switch off the stove, allow it to cool for sometime, and make into equal sized balls.
In the meantime, while the mixture is getting cooled, roast the items given in the section to roast and grind with little oil and grind it smoothly with 2 tsp of coconut and keep aside.

In a heavy bottomed vessel, pour in the tamarind juice, add a tsp of sambar powder and salt.  Switch on the stove and allow it to boil for 5-7 minutes until the raw smell goes off.  Lower the flame, gently add 2-3 the round shaped lentil balls one by one carefully.  When it floats on the top, slowly add the remaining balls one by one.  Do not stir immediately after adding the balls, allow it to cook.   After sometime, you would see the balls start floating at the top, which means it had cooked.  

When you see multiple lentil balls floating, add the ground mixture and stir well.  Let it boil for few more minutes.  Switch off the stove.

Temper the kuzhambu with mustard seeds and curry leaves. 

The gravy/kuzhambu can be mixed with steam rice and can be accompanied with a roasted curry.   

The lentil balls can also be taken as a side dish to the gravy.

Wednesday, February 15, 2017

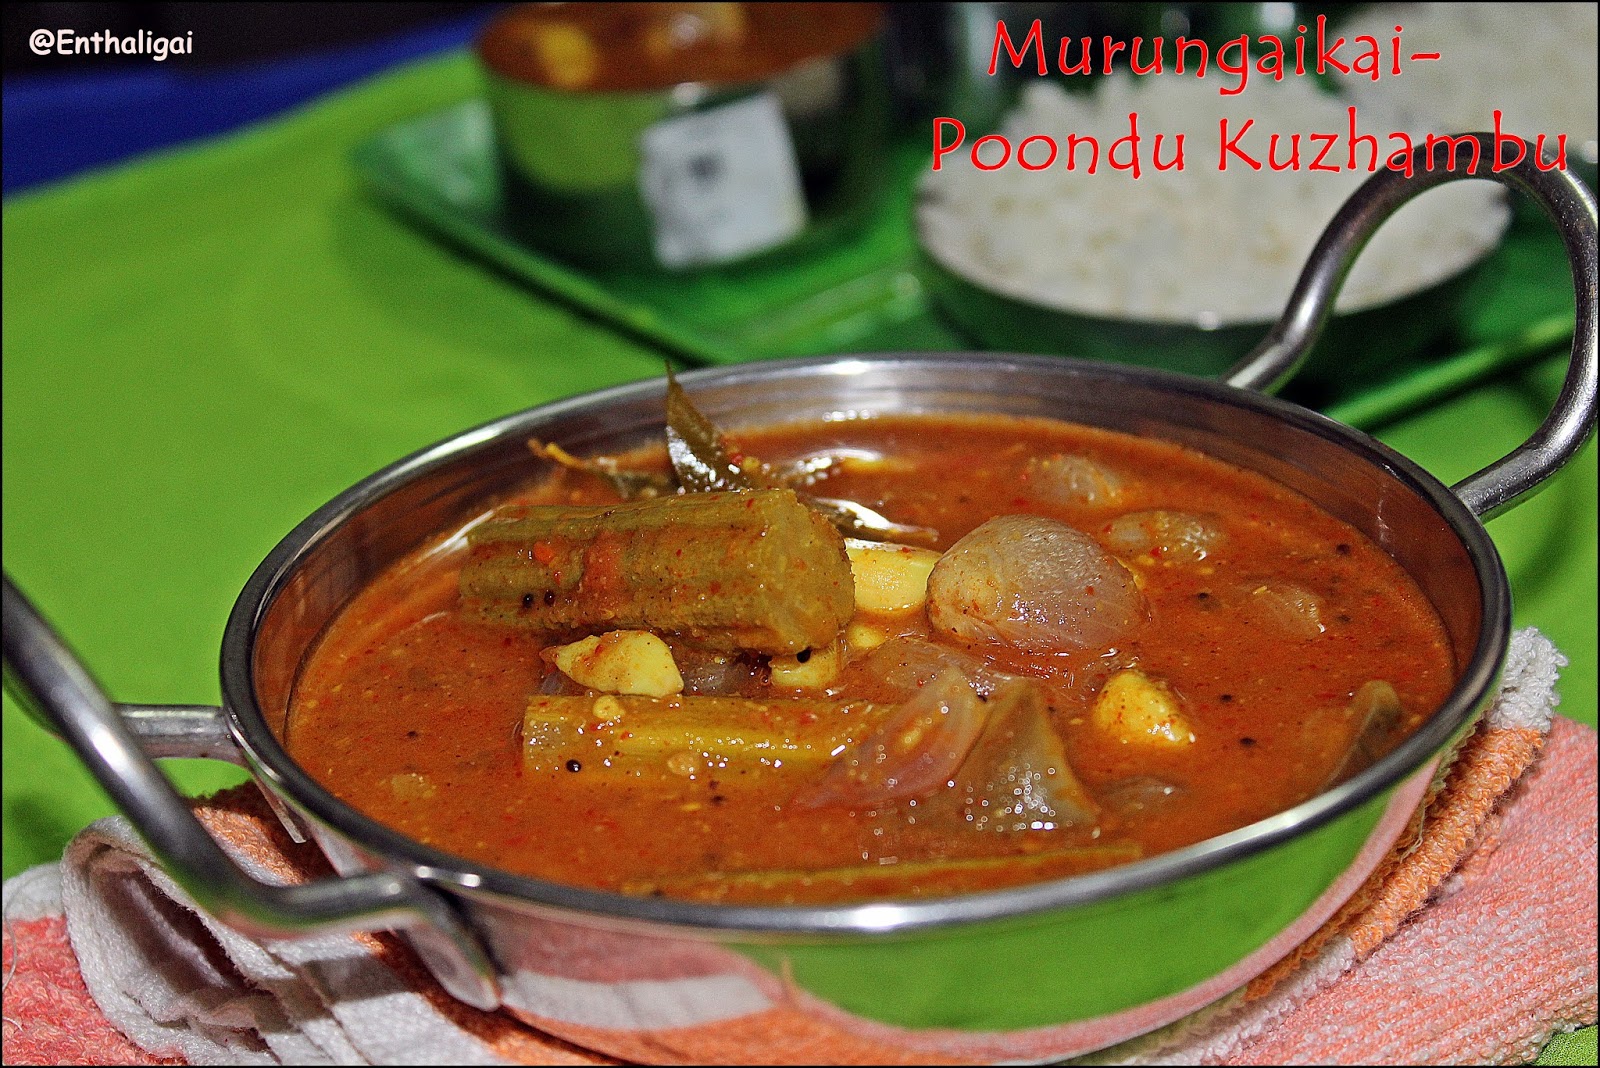
CHINNA VENGAYAM-MURUNGAIKAI-POONDU KUZHAMBU

A spicy dish made with a combination of small onion-drumstick-garlic cooked in tamarind sauce flavored with freshly ground Indian spices.  A special masala powder is made with frying necessary spices and that adds a distinctive flavor to the dish.  

INGREDIENTS:
Small onion -  1 cup
Peeled garlic pods -1 cup
Drumstick (cut in 1" piece) - 1 cup
Brinjal (cut in big slices) - 1
Tomato - 2
Tamarind (soaked in warm water)
Turmeric powder - 1 tsp

For the powder:
Asafoetida - small piece
Mustard seeds - 1 tsp
Urad dhal - 2 tsp
Fenugreek seeds  - 1 tsp
Peppercorns -very few
Red chillies - 10-12
Jeera - 1 tsp

To Temper:
Mustard seeds - 1 tsp
Curry leaves - few

Preparation:
1. Peel and small onions and garlic and cut the keep the other vegetables ready.
2. Soak tamarind in water and squeeze out the water from the pulp.
3. Fry the items given in To grind section (Except jeera) with little oil, add jeera before grinding and make the masala powder.  
4.  In a heavy bottomed pan, add oil and throw in mustard seeds and when it sizzles, add in the curry leaves.  Later add small onion and garlic and saute well.  Once the onions have become slightly brown, add in tomatoes, drumstick, and brinjal one by one and mix well.  Add the freshly ground masala powder, salt, and mix well. Finally add the tamarind pulp and let it boil until vegetables are cooked and gravy get thickens.  When it boils, you would get a nice aromatic flavor at home.
Mix well with rice and enjoy a satisfactory meal.

The gravy thickens with time and tastes better after a settling time.


Sunday, April 10, 2016

CHETTINAD SPECIAL MANGAI VENDAIKKAI MOCHAI MANDI

Ah!! It's very hot here in Chennai, but one thing I like about it is the Mangoes.  Mangoes are available throughout summer.  Be it a tiny baby tender mango which is used to make Maavadu (a kind of pickle without oil), raw mangoes or riped one, my family likes in any form.  This is the starting season here and I started including in all the recipes. 


Moving to this particular recipe, this is a authentic Chettinad region recipe which is very famous there, Vendaikkai Mandi.  Mandi is the washed water taken from rice which adds a special flavor to the recipe.  DH is very fond of this recipe and asks me to prepare this often.  Adding mangoes to the dish adds a unique taste to the dish.  This dish can be mixed and eaten with cooked rice.

Ingredients:
Ladies Finger - 1/4 kg
Raw Mango - 1 small cup (cut in cubes)
Onion - 2 (chopped)
Tomato - 1  (chopped)
Garlic pods - 10
Pressure cooked Mochai (Field Beans) - 1 cup
Arisi Mandi (Washed water from rice) - 3 cups
Tamarind  - small gooseberry sized soaked in Mandi water
Chilly powder - 1-2 tsp
Coriander powder - 1 tsp
Salt - To taste
Oil - 2 tsp

To Temper:
Mustard seeds - 1 tsp
Curry leaves - few
Slit green chillies - 2 

Preparation:
1. Dry roast Mochai for a minute or two in a thick bottomed pan and pressure cook for 6 whistles or until soft along with salt and a  pinch of turmeric powder.  You can also soak overnight and pressure cook for 2 whistles.
2. Wash 1/2 cup of rice in water and then add 3 cups of water and soak for 5 minutes, drain this water and soak the gooseberry sized tamarind in this.  
3. Meanwhile cut the ladies finger in 1", raw mangos in cube size, chop the onions and tomatoes and keep it ready, and peel the outer skin of garlic pods.
 

4.  In a heavy bottomed kadai, add 2 tsp of oil, when hot throw in mustard seeds, slit green chillies, and few curry leaves.

5. Add the onion and tomatoes, later drop the ladies finger and cut cubed mangoes.  
 

6. Add salt, chilly powder, coriander powder and saute well.
 

7.  Add the extracted mandi-tamarind based water to the mixture and let this cook in medium flame.
8.  Once the vegetable has cooked well, add the cooked mochai and let this boil for 5 more minutes. 
 9.  The final outcome will neither be too water nor too thick.            


 10. Serve hot with cooked rice.  We relished with two curries, kovaikkai (Tindora) and pagarkai (Bitter gourd).  It was a full appetizing meal indeed.