Saturday, July 25, 2015

AUTHENTIC IYENGAR MILAGU KUZHAMBU - SPICED BLACK PEPPER IN TAMARIND SAUCE

As I have written earlier, I prepare pathiya samaiyal once in fortnight.  My family is a great fan of black pepper, be it prepared as rasam, kuzhambu or added in gravies, we like it a lot.  Black pepper produces a good aroma and flavor when roasted and ground are at proper stage.   The flavor imparted from freshly ground peppercorn stimulates the salivary glands and increases appetite and aid in food digestion. 


Moving to the recipe quickly, the recipe narrated below is an authentic way of preparing Milagu kuzhambu at Iyengar homes.   This is a no onion and no garlic recipe yet tastes flavorful.  The hotness and flavor produced by roasted peppercorn gives an unique taste to the dish.  Try this at home once and I bet you get addicted to this :-).  The preparation is very simple that it can be made in jiffy in just 10 minutes and it tastes delicious with more settling time.


Ingredient:
Urad dhal - 2 tsp
Tamarind (Soaked in warm water) - gooseberry size/can be replaced with tamarind sauce
Turmeric powder - 1/2 tsp
Salt - To taste

To roast and grind:
Black Peppercorn - 5 tsp
Red chillies - 3
Asafoetida - a small piece
Curry leaves - few
Jeera - 1 tsp

To temper:
Gingely oil - 2 tsp
Mustard seeds - 1 tsp
Curry leaves - few

Preparation:
1.  Soak tamarind in hot water and extract the juice from it.
 

2.  Roast and grind the ingredients in little oil.


3. In a pan, add gingely oil and throw in the tempering agents.  On the mustard seeds splutter, add in curry leaves and pour in the extracted tamarind juice.


4.  Add turmeric powder, salt, and the ground mixture.  .

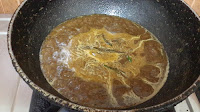
 5. Let this boil for some 10 to 15 minutes until the gravy has become in thicker consistency.
6.  Mix with rice and you get a wonderful feel upon taking the first bite :-).

7. We had a wonderful combination of meal today, Milagu kuzhambu, poondu rasam, murangai keerai poriyal, chow chow and carrot poriyal, cucumber salad, home made nellikai oorughai, and thalicha moor.

Sunday, July 19, 2015

MINI MASALA VADAI (TEA KADAI STYLE) - LENTIL FRITTERS

One specialty about India is we can find lot of roadside tea stalls where they would serve hot tea and some spicy snacks; especially when I have travelled to hill stations like Ooty, Kodaikanal, etc i have felt that roadside shops serves the best tea than several star-rated restaurants.  The aroma produced by masala vadais fills in air and would make your salivary glands work all at a time.  To me, even thinking about that would make me go hungry.


Ingredients:
Channal dhal - 3/4 cup
Toor dhal - 1/4 cup
Urad dhal - 4 tsp
Onion - 2-3
Red chillies - 6
Green chillies - 3
Curry leaves - few
Salt - As needed
Asafoetida powder - a pinch
Oil - As needed

Preparation:
1. Wash and soak all the dhal together for an hour (Toor dhal, Channa dhal and urad dhal).
2. Drain the water separately and take a 2 tsp of soaked dhal in a bowl.
3.  Grind the remaining dhal along with red chillies, salt, and asafoetida powder.  The ground mixture should be on coarse texture.  Add this to the bowl.
 

4.  Add finely chopped onions, green chillies, and curry leaves.  Mix well.
5. Take a lemon-sized batter on the center of your left palm  and press with right palm.  This would flatten the sides of the batter and the center would be little thicker.


6. Heat oil in a heavy bottomed vessel, gently drop it in hot oil and add few more vadais to the hot oil.  The flame should be on the low or low to medium side.
7.  When the color changes and flip and cook on the other side.  
8. Flip on both sides until it turns golden brown and crispy.


Sunday, July 12, 2015

Pakarkai-Poondu Kuzhambu - Bitter guard-garlic cooked in thick tamarind gravy (Indian Style)

I usually make "pathiya samaiyal" once in 10 days and DH is very appreciative about this.  Pathiya samiyal is a diet given during certain phases such as postpartum or illness such as fever, cold, indigestion. etc.  These dishes need not be taken only during illness but can be at anytime by anyone.  Owing to the lifestyle-induced dietary changes, I incorporate traditional dishes in diet once in 10 days. 

Moving to the recipe, this "poondu kuzhambu"/ garlic gravy is prepared and given during postpartum period.  Garlic has properties that stimulate the gastric system and help relieve gas and abdominal bloating.  The hotness would be on the milder side.  Last weekend when I was peeling the garlic cloves, DH asked me to include bitter guard.  I was very hesitant as to how the dish would come but I would say it came out well.  The bitterness is tamed with the addition of garlic, spice powder, and a piece of jaggery. 


You can omit bitter guard and just make the dish with garlic alone.  


Ingredients:
Small pearl onions - 1 cup
Tomato - 1
Garlic pods - 1 cup
Bitter guard - 2
Jaggery - 1 small piece
Tamarind - lemon size (soaked in warm water)
Salt- As required
Oil - As required

To roast and grind
Asafoetida - Small amount (size of a peppercorn)
Channal dhal - 2 tsp
Urad dhal - 1 tsp
Pepper - 1 to 1.5 tsp
Red chillies - 5-6
Mustard seeds - 1 tsp
Jeera - 1/2 tsp

To Temper
Mustard seeds - 1 tsp
Curry leaves - few

Preparation:
1. Soak tamarind in warm water and extract the juice from the pulp.
 

2. Cut bitter guard into small pieces and pressure cook separately with little salt and water.  Make sure not to overcook the vegetable. 

3. Meanwhile roast the items given in the roast and grind section in little oil excluding jeera.  Add jeera while grinding to powder.    
                   
4.  In a wok/heavy bottomed vessel, add oil and thrown in mustard seeds and when it crackles, add the curry leaves.  Later, add the small onions, garlic and tomatoes.   Add required salt.  When the onions have turned slightly brown, add cooked bitter guard and mix well.
 

5. Now add the freshly ground powder and mix well .  Add the extracted tamarind juice to this.
 

6.  Transfer to a vessel and let this boil for 10-15 minutes.  The mixture would get thickened with time.  Give special attention to not make the gravy burnt at the bottom.
 7.  Add little jaggery to the dish and let this boil for a minute.  Now the hot aromatic garlic kuzhambu is ready to serve.

8. If you are not a lover  of bitter guard, I suggest you to omit bitter guard and follow rest of the steps.  This kuzhambu tastes best with more settling time.


Sunday, July 5, 2015

TOMATO-SWEET CORN RICE - An Easy comfort lunchbox meal

I prefer to pack variety rice for lunch as it is not only easier to make but also a complete comfort meal.  During  my school days, I never liked tomatoes and as I get older my food preference got changed eventually.  I am sure many of us would have gone through the gradual transition in likeness - from a nonliker to a complete craver and vice versa.  Now I couldn't image managing my kitchen without tomatoes.

I still remember the time when mom packs this special tomato rice for lunch during my school and college days.  In no time, my lunchbox would get finished whenever she packs this dish.  I have always felt that there is an extra flavor in Mom's recipe and later learned the secret of it.  It is the addition of freshly ground spice powder.


With the thought of exploring the changing food likeness, I added sweet corn to this dish.  The sweetness rendered by sweet corn at every bite along with the spiciness and flavor imparted by the "spice powder" placed the dish on the top hit list at home.


Ingredients:
Cooked rice - 2 cups
Tomatoes - 1/2 kg
Onion - 2
Sweet corn kernels - 1 cup (i used frozen sweet corn)
Green chillies - 3-4
Garlic pods - 10
Chilly powder - 1 tsp

To roast and grind
Bengal gram - 3 tsp
Urad dhal - 1 tsp
Dhania (dry coriander seeds) - 1 tsp
Red chillies - 4-5
Asafoetida - 1 small piece (Can be replaced with powder)

To Temper:
Mustard seeds - 1 tsp
Urad dhal - 1/2 tsp
Bengal gram - 1/2 tsp
Cloves - 2
Cinnamon stick - 1/2 piece
Curry leaves - few

Preparation:
1. Cook rice in pressure cooker.  Allow it to cool completely.
2.  Roast and grind the items given in "To roast and grind section".
3. Cut onions and tomatoes as desired. Slit green chillies.


4. Heat a wok/pan with little oil and throw in the tempering items one by one.
5.Add the onions and garlic pods and required salt.  
 
6. 
When the onions have turned slightly brown, add sweet corn kernels.
 7. Add tomatoes and mix well.  Let this mixture gets cooked in medium flame.


8. When the tomatoes have turned mushy and corn kernels have cooked, add ground spice powder and chilly powder. Mix well and keep in flame for 2 minutes.
 

9. Add the cooked rice and mix well.


10. Can be served with raita, chips or any dry roasted vegetable.