Saturday, March 28, 2015

GREEN TOMATO GRAVY - WITH A LINKAGE TO MY BLOG NAME

As I think more seriously of blogging regularly on weekends, I created a page in FB last week with the thought to make it more useful for someone.  Thanks to all who are supporting me in terms of likes, comments and private messages.   It is all you who is making my passion grow stronger. 

Some of my readers have sent me private messages asking the meaning of my blog name, Enthaligai.  It is a pure Tamil word where “En” means “My/mine” and “thaligai” refers “cooking”.  It means “My cooking”.  

To me, cooking is very intimate thing.  I just do not cook for the sake that I need to do this job but cook with real love.  When I invite someone on the dining table and serve my cooked food, I invite them to my life.  In my blog, I touch up on the recipes with little story because I never wanted this blog just for documenting my cooking style but wanted to use this space to share my thoughts/opinion/feel/life/my people.  When I get old or my son gets old, when we turn on these pages of these chapters, I am sure this would give us previous memories.

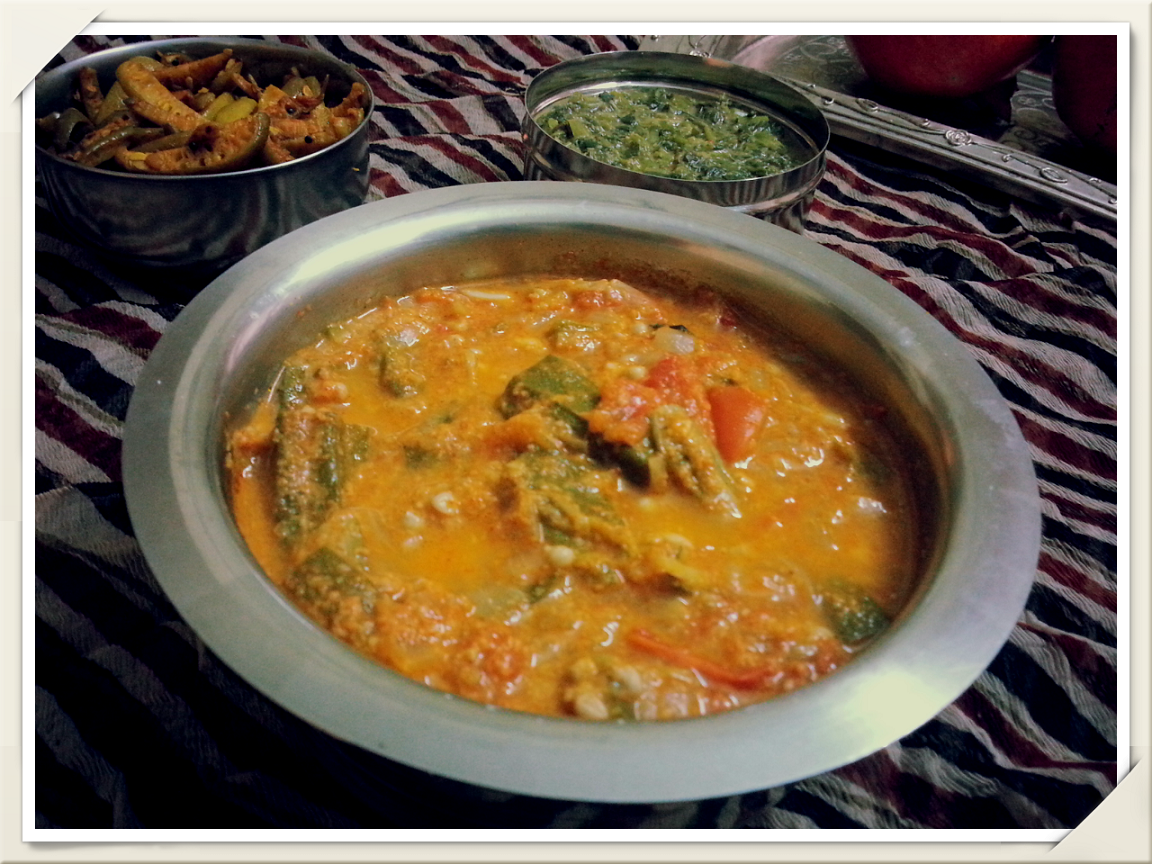
Without deviating much further, I will write about today’s stuff.  It’s about gravy prepared using Green tomatoes.  I first tasted this dish in a hotel in Chennai some months back.  I liked it very much.  With the taste, I tried to capture the ingredients that could have been used in this dish and reserved it in my mind.  Until then, I never knew green tomatoes can be used for cooking.  When we went to market place few days back, I found green tomatoes and grabbed with the thought of trying out in my kitchen.  I recollected the taste and tried out at home.  It came out perfect at first try.  When I checked with DH for the taste, he nodded his head which is an okay sign for me to try again :-).


Ingredients:
Green tomatoes – 1/2 kg
Kidney beans – 100 g
Moong dal – 1 small cup
Salt – to taste
Oil – 1 tsp

To temper:
Mustard seeds
Curry leaves

To grind:
Coconut – 1 small cup
Green chilies – 3
Jeera – a teaspoon


Preparation:
1. Soak kidney beans overnight and pressure cook for 4-5 whistles.  Pressure cook Moong dhal with little water along with that in a separate container.


2. Wash green tomatoes and cut into four cubes as shown below.


3. In a pan, add oil and the tempering ingredients when it is hot.  When the mustard seeds crackles, add curry leaves, then green tomatoes, required salt, and later tumeric powder. Once the salt and turmeric powder blends with tomatoes, transfer this to a container and pressure cook for 2-3 whistles.  This is done to save the cooking time of green tomatoes. Unlike red tomatoes, green takes longer time to cook. Hence I preferred to pressure cook.


4. Meanwhile, grind the ingredients given the list (Coconut, green chillies, and jeera) and keep aside.


5.  Once the pressure releases, add the ground paste and cook for 2 minutes.  Then add the cooked kidney beans and later moong dhal one by one.  
7. Check for salt, let this boil for 3-5 minutes until all the ingredients blends together nicely. 


This can be served as a side dish for rice or rotis.


Saturday, March 21, 2015

The Lunchbox Movie Delivered Dish – Bitter gourd Curry (Karela ka Subzi)

Over the last decade, I have never watched any Hindi movies on big screen because DH does not understand the language, hence didn't give much interest in taking me to theater to watch it.  However, I watch the blockbusters on net or television but barely get a chance to watch it continuously.   I hardly get the remote on my hand when both DH and Jr.H are at home and the news channels and cartoon channels take the higher priority or else I would be called upon frequently for something or other. 

Sometime back, I saw “The Lunchbox” movie on a flight journey; the reason for saying this is I watched the film uninterruptedly :-) .  Wow..what an incredible movie .... It is the story of a typical Indian woman who tries to save her failing marriage by trying out new dishes in her cooking.  This might sound something funny or this statement would make someone frowning but this is how we have been raised.  We have been told from childhood that cooking is the first thing that will help a woman to take the charge of whole family. 

Switching back to movie, the film knocked my socks off.  The dishes that the woman tried were all drooling.  One such was bitter gourd curry.  For a normal eater/foodie, this must be a dish which would just get added to their try list but a food blogger like me, my mind was racing with the different variations that the recipe could be made and what variations would be a hit list at home.  The next time when I went to market place, I bought the medium-sized bitter gourds and tried this at home.  It was a big success.  DH and Jr. H asked for second serving which lighted a 1000 watts bulb on my face :-D


This process is quite elaborative one but definitely a worth to try.  The original recipe called for frying out the stuffed bitter gourds but I avoided it as I know DH will complain about the excess oil.  Instead I shallow fried the vegetable on low flame but it is equivalently tasty.  The bitterness is tamed with the addition of spice powders and onion.  


Ingredients:
Bitter gourd – 1/2 kg
Onion – 2 medium sized
Oil – 6 – 8 tablespoon

For the powder mix:
Fennel powder – 2 tsp
Coriander powder – 3 tsp
Puliogare powder – 3 tsp ( I used MTR Brand)
Chilly powder – 3 tsp
Salt – To taste

Preparation:
1. Remove the outer skin of bitter gourd as shown in the picture. 


2. Make a small slit on one side and remove the seeds carefully.


3. Slice the onions

4. Make Fennel powder by grinding some fennel seeds in the mixer.  Let this be a bit on the coarse side.
5. Mix all the powders given in the ingredient section.  Adding fennel powder is a must because the light sweetness in fennel powder would suppress the bitter taste.  Addition of puliogare powder will further suppress the bitter flavor.  The   along with sweetness will produce a delectable flavor twist.


6. Stuff the bitter gourd with the powders carefully.

7.  Heat a wok with oil and add the onions.  Adding little salt to the onions would cook the onions fast. 

8.  When the onions have become brown, add the masala powder stuffed bitter gourd, add little turmeric powder.
9. Carefully turn the bitter gourd then and there so as to make sure it is not burnt.


10.  Close the wok with a lid and cook in low flame carefully giving gentle twists and turns when needed.  It would approximately take 20-30 minutes to get cooked.

 11.  When it gets cooked fully, the color turns in fact, add the remaining left over powder (if any).  Cook further for 5 more minutes until the masala blend with the vegetable.


12. Finally serve with love which will further reduce the bitterness  :-) :-)


Saturday, March 14, 2015

A LINK TO MY MATHEMATICS INTEREST – LADIES FINGER (OKRA) MASALA GRAVY

Many people would have heard the old Grandma saying which is used until now by all the Moms “if you eat ladies finger, you will be good at Maths”.  Still I don’t know how this is linked with Mathematics J but I pass on the same dictum to Jr. H. 

Even as many years pass by, certain memories remain forever engraved in mind.  One among them is mathematics examinations.  Mom would always make ladies finger at home during those examinations.   She serves the larger portion to me and my brother and insists on finishing it.  Though she has made the trick in making us to eat this vegetable, it has worked out a bit too. Today my brother is one of recognized stock market advisor in India; I am astonished by seeing his skills in financial management.  I am not as good as my Bro but I would say I have acquired decent multitasking skills.

In my home, we all love ladies finger in any form.  I would make either kuzhambu or curry with okra but this recipe is originated from a buddy from my office lunch group.  Since I loved the taste, I tried at home immediately with slight variations to suite our family taste buds. 


Ingredients:
Ladies Finger - 1 Bowl (Cut to 1" pieces)
Onion - 2 (Medium sized)
Tomato - 5-6 (Medium sized)
Garlic pods - 10 (Optional)
Chilly powder- 2 tablespoon
Oil - 2 tablespoon
Salt - as desired

To grind:
Fennel Seed - 1 teaspoon
Grated coconut - small cup

To Temper:
Fennel seed - half a teaspoon
Curry leaves

 Preparation:

 1. Wash and cut the ladies finger into 1" pieces.  Slice the onion and tomato as below.
2. Heat a pan with two tablespoons of oil, once it has become hot, add the tempering ingredients one by one.  Later add onions.   Sprinkling little salt to the onions will cook the onions fast.  Once the onions had turned light brown, add the tomatoes.  
 3. After the tomatoes had turned mushy, add ladies finger, add the required salt and mix well.

4. Once the mix has blend well, say for about 3-4 minutes, transfer the contents to a bowl and pressure cook for 1 whistle.  Since i have a small pressure cooker, I directly pressure cooked.  
 

5. Meanwhile, grind the coconut with fennel seeds. 
 

6. Once the steam has released from pressure cooker, transfer the cooked items to a vessel. You can omit this step if you have already transferred the ingredients in vessel.


7.  Add the ground paste and chilly powder, boil for 5 minutes in low flame until everything is mixed well and the raw smell is gone. Serve hot with rice or rotis.  


Thursday, March 5, 2015

IDLY PODI – A MAGICAL LIFESAVER AT HOME

If you ask Jr. H and DH at home whether they like me or my podi, the spontaneous unanimous reply from both of them would be “Podi”. Well, I am not saddened with this because it is same with me when I go to my mom’s place.  My mom is an expert in making all kind of powders.  When I grew up, I rarely help mom in kitchen in cooking but it has always been my job in grinding the powders after she has done the initial preparation.  She just leaves the kitchen to me and asks me to do the grinding part.  Unknowingly, this has taught me to know about the ingredient list for every recipe.  She shrewdly made myself to inherit her cooking skills without any extra effort, isn’t. 

When I started cooking, I should honestly say, she never taught me about the ingredient lists specifically for any recipe but on my own I can list out based on the little-to-no help offered to her.

Touching upon the title, you might be wondering how a powder can save a woman at home; it really does the magic at my home.  Jr. H eats his morning breakfast without any question if he sees the podi on his plate.  DH is very picky about food. He expects the main dish to be filled with apt side dishes every day.  Idly should always accompany with idly sambar but at times when he sees the podi in plate, he never questions me anything and just finishes silently.


Wish to pass on this hit list to the fellow readers to try out the magical success.

Ingredients:
Bengal Gram (Channa dal) – 1 cup
Urad dal – 1 cup
Black Til – 1 cup
Hing – a small piece
Salt – as desired
Red Chilies – 25 (adjust according to your spice level) 


Preparation:

1. Heat a pan and add rock salt.  Keep in flame for half a minute and transform to a plate.  This will help to remove the moisture from the salt.

2. Dry roast all the ingredients one by one; black till until they splutter
 3.  Roast channa dal and urad dal until they change their color.


4. Add very little oil, add the asafetida and then red chilies.  Keep in flame for a minute and transform to a plate/bowl.

 4.  Grind the ingredients one by one after they have cooled down.  The texture of the mixture should be bit coarse for better results.
5. In a wide pan, mix the powder well to avoid any lumps.  Transform to an air tight container.


6.  Serve with hot idlys/dosa with little gingely oil/ghee.

Sunday, March 1, 2015

Happiness means at times eating Vegetable Biryani!!

It has been quite a very long time I stayed away from blogging for various reasons.  The more I stayed away, I more I was addicted to that in fact.  I was a silent lurker in all this time frame and never missed any of my favorite blogger recipes.   Every time, I wish to resume blogging, I was afraid if I would be able to continue it ever and stayed back for this reason.  However, the thirst of recommencing blogging has always been there at the back of my small brain.

Time flies very fast and now Junior H has grown up and takes care of him individually at most of the times.  He is pretty much like me J, a foodie by nature, and is the first criticizer of my dishes.  This nature of him pushed me the fact of resuming blogging for a purpose; when he gets old he can have the collection of his mommy’s recipes.

Coming to the recipe, I have always enjoyed eating Biryani.  I started knowing the dish when I was about in 10th grade of school.  Ever since, my fondness on Biryani has never faded and I have tried out in several variations which has mastered me in this special dish.  

I have my own set of lunch gang in office and this recipe is derived from one among them with my own variations to suit my family taste.

Ingredients:

Mixed Vegetables (Beans, Carrot, Cauliflower, Green Peas, Potato) – 1 large bowl
Mint and Clintaro leaves – 1 cup
Onion – 1 big size
Tomato – 2 medium size
Soya chunks/Meal maker – half cup or as desired (I used medium sized)
Ginger and garlic paste (make with 1/2 inch piece of ginger and 5 pods of garlic)
Green chillies – 2
Basmatic Rice – 1 cup
Chilly powder – 1 teaspoon
Coconut milk – 0.5 cup (optional)
Cardamom – 1
Cinnamon – 1 inch
Clove – 3-4
Ghee – 2 tablespoons (As desired)
Oil – 4 teaspoons
Water – 1.5 cups

Pre-Preparation:
1. Soak the basmati rice in warm water for about 30 minutes. 
2.  Wash and chop the vegetables in desired form.
3. In the large bowl, boil hot water with salt, and upon reaching the boiling stage, switch off the flame, and add soya chunks.  Let it remain for 10 minutes.  Drain the water and squeeze out the soya chunks to drain the absorbed water.
4. Heat a pan with little oil and shallow fry the soya chunks.  This would help to remove to raw taste from them.
5. Grind ginger, garlic, and green chilies and keep it aside.
6. Chop the clintaro leaves and clean both mint and clintaro leaves in water to remove the dust.
7. Extract coconut milk from a fresh coconut.  This is completely optional but gives rich taste to the biryani.

Preparation
1.      Heat the pressure with oil and add bay leaf, cinnamom, cardamom, and cloves.
2.      Add chopped onion and later tomato
3.      Once the tomato has turned mushy, add the cleaned mint and cilantro leaves.
4.      Add the chopped vegetables except green peas and cauliflower and add salt as desired.
5.      After 3 minutes, add the ground paste of ginger, garlic, and green chillies.
6.      After the raw smell of paste has diminished, add chilly powder.  This will give a good color to the biryani.
7.      Add the required amount of water, once it boils, add the basmati rice after draining the water content.
8.     Add coconut milk if you have planned to use, else increase the water content by 1/2 cup in previous step.
9.     Add soya chunks, cauliflower florets, and green peas.
10.  Add 2 teaspoons of ghee.  Close the lid and pressure cook for one vessel.  Remove the lid once the pressure releases.